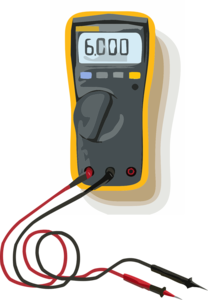
Do you have your measuring instruments calibrated? Do you know what to look for?
As part of our QM system according to ISO 13485, we also have a process for measuring and testing equipment and calibrate some of our important measuring instruments.
We develop new circuits. This is done first theoretically with pencil and simulation. Then the circuits are tested. For this purpose, functional models and prototypes are built, and correct functionality is verified through measurements within the circuit. We must be able to rely on these measurements and trust the measuring instruments.
Calibration helps with this.
 Confidence in the measurement results is documented and objectified through calibration. By comparing the measured values of a device with a traceable standard at regular intervals, one obtains proof that a measuring device is measuring correctly (see also Traceability on Wikipedia).
Important terms
Important terms in metrology can be found in many places. Good introductions can be found at calibration service providers such as WIKA calibration, Fluke, ESZ AG, Text …
In the Brockhaus encyclopedia, some important terms have the following meanings:
calibration – Calibration, in electrical measurement technology the determination and checking of the scale of a measuring instrument during the manufacturing process.
calibration – in technical terms, often refers to adjustment or calibration, actually the process for maintaining the accuracy of measuring instruments based on the Calibration Act for all commercial and official transactions.
adjustment – precise setup of technical equipment before use.
Confidence interval ⇨ confidence estimate In statistics, the inference from sample information to an unknown characteristic of the population using confidence intervals.
Types of calibration
When calibrating measuring instruments, you usually have the choice between DAKKS and ISO calibration. Which calibration should you choose, and how do they differ?
DakkS
DAKKS calibration is the gold standard in Germany. DAKKS calibrations are performed by laboratories audited and verified by the German Accreditation Body (DAKKS). Calibration certificates are internationally recognized, and the calibration is traceable to national and international standards.
ISO
ISO calibration is less extensive than DakkS calibration, meaning it involves fewer measurement points and less documentation, which is why it is generally less expensive. It corresponds to a factory calibration, but meets the requirements of standard 17025. The calibration laboratory does not need to be DakkS accredited and is subject only to its own quality control.
Calibration certificate
 When you receive a device back from calibration, you should check the calibration certificate. A calibration certificate should contain the following:
• Device identification: Which device was calibrated? Information about the measuring instruments used (serial number)
• Calibration procedure: According to which regulation or procedure was the calibration carried out?
• Date, place of implementation, examiner
• Information on measurement uncertainty
• Measurement results
• Depending on calibration: DakkS or ISO calibration mark
The requirements for calibration certificates for DAkkS-accredited calibration laboratories are defined in the document DAkkS-DKD-5, which can be downloaded from www.dakks.de [2].
You should also review and submit your calibration laboratory's certificate. It's important that the calibration laboratory is certified for the parameters to be calibrated.
We have our multimeters calibrated according to DakkS. For other measuring instruments, we assess the need for accuracy and traceability and then decide which calibration is best for us.
Do you have any comments or suggestions? Leave us a comment or send us an email.
We welcome feedback.
Best regards
Martin Bosch
Sources
[1] Info on traceability at NIST (Accessed 07.05.2021)
[2] Information sheet on metrological traceability from DakkS (Accessed 07.05.2021)↩
